The merchandise must be sent to the following address:
Alaquàs (Valencia)
46970
In the main panel on the left we can enter Merchandise. From here we will see and manage the merchandise entries that are going to be made in our facilities.
It is very important that you create the merchandise entry before sending it. Why? Because when you create it, a reference is automatically generated (e.g. #PO2300...). You will have to put this reference on the outside of your merchandise, so that it is visible. This is mandatory, and also, it will facilitate the entry of merchandise, so we will enter it faster.
It is mandatory to fill in ALL fields. However, at the time of entry, the merchandise doesn't have a tracking code because it hasn't been shipped yet. Therefore, you have to put "ND" (not defined) in the fields you don't know. This way you will be able to create the merchandise entry and the reference will be generated (e.g. #PO2300...).
Once you have the courier and the tracking code, you must click on "edit merchandise", and then fill in the fields where you put "ND".
How to create a merchandise entry
If you have purchased product outside of Beeping and our team has to receive your merchandise in the warehouse, this step is necessary.
We have to click on New entry.

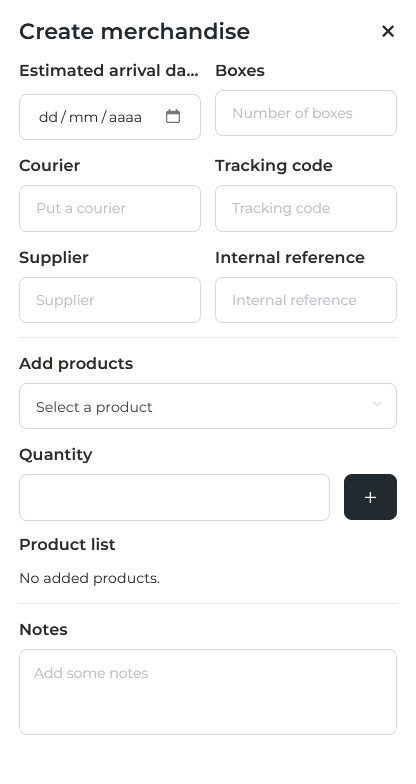
You will see some fields to fill in. All information is mandatory and the more information you give us, the faster we can process your incoming goods at our facilities once the order arrives.

- Estimated arrival date: select the estimated date from the calendar.
- Boxes: how many boxes or packages will arrive.
- Courier: the company that will bring your merchandise.
- Tracking code: the one provided by the courier. When you create the entry, you will not know the code. You can put "ND" (not defined) and when you have it, edit the entry.
- Supplier: you can indicate the supplier of your order.
- Internal reference: it will be the reference that you give to your order internally, to identify the entry.
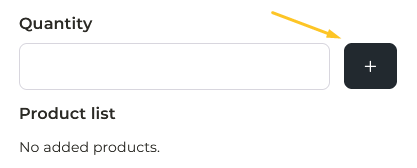
- Add products: you choose the product you have previously created. When adding each product, you have to click on the '+' symbol.

You can add as many products as you want as long as they come under the same tracking number, i.e. in the same box or entry. - Quantity: units of product to be added to your stock.
- Notes: you can add notes for us to take into account when your goods arrive.
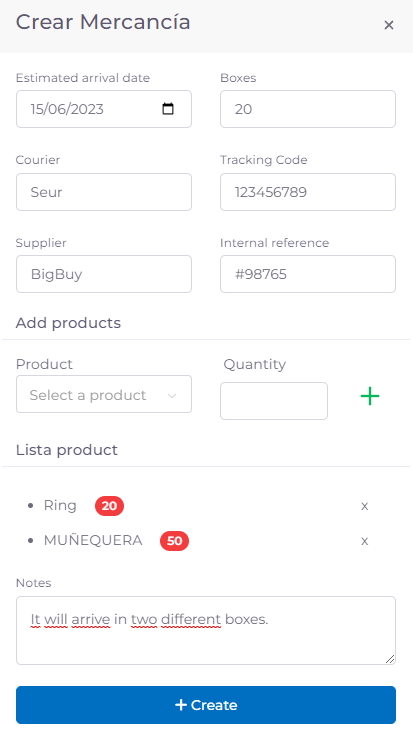
Here is an example:

Once we have everything filled in, we can click on Create.
How to view my merchandise information
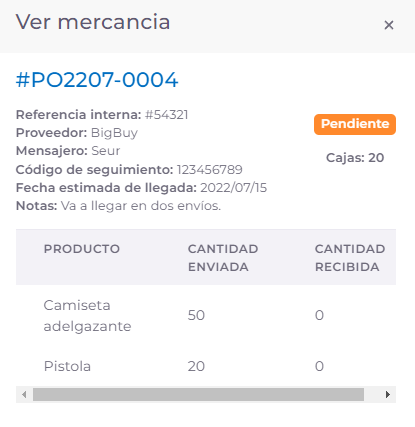
When we have a merchandise entry created, we can see the information by clicking on the eye icon on the merchandise we want to see.


We will be able to see all the information that we have entered at the moment of creating the entry, as well as the status in a colored label.
In addition, in the table, two columns will appear: Quantity sent and Quantity received. In the second column will appear the stock of the first one when your goods have entered the warehouse.
What is the status of my goods
Once we have created a merchandise entry, you can see how it will appear in Status: Pending.
But first of all, let's get started.
Where to view the status of a merchandise
By clicking on the eye of a particular entry, you will be able to see its status, as discussed in the previous step. However, if you want to see the status of your merchandise in general, you have to look at the Status column, where you will see by color the status of your merchandise. You can see where the column is located in the following image:

What types of statuses are available for merchandise receipts?
The merchandise can always be seen in one of the following statuses, which will be updated automatically depending on the point at which they are:
- Pending: this is the status in which the merchandise is automatically placed when you have created it. It indicates that the merchandise hasn't yet arrived at our facilities.
-
Entered: the goods have entered our warehouse but it hasn't yet been possible to process their entry, so it doesn't yet appear as received.
-
Partial reception: this status appears when only part of the goods have arrived.
-
Received: in this status, all or even more goods have arrived.
-
Cancelled: this status appears when the shipment of goods has been cancelled.
How to filter goods by status
At the top you can filter by status and date:

How to edit a merchandise entry
If you have created your merchandise entry prior to knowing data such as courier or tracking number, you can edit your merchandise entry when you have the data.
